Showing posts with label dessert. Show all posts

Monday, September 9, 2013

Best Birthday Cake Ever: Part 2

Well, I can now say that I really made it.  That is, made it through the first year of motherhood!  I have many people to thank for this epic achievement.  Namely, my most fantastic and supportive husband, the Three Aunties of Camberville (you know who you are), and my awesome dragon parents group.  Of course, we must not leave out the six adoring grandparents and other family and friends who have been amazing and loving as well.  It really does take a village to care for a little one.

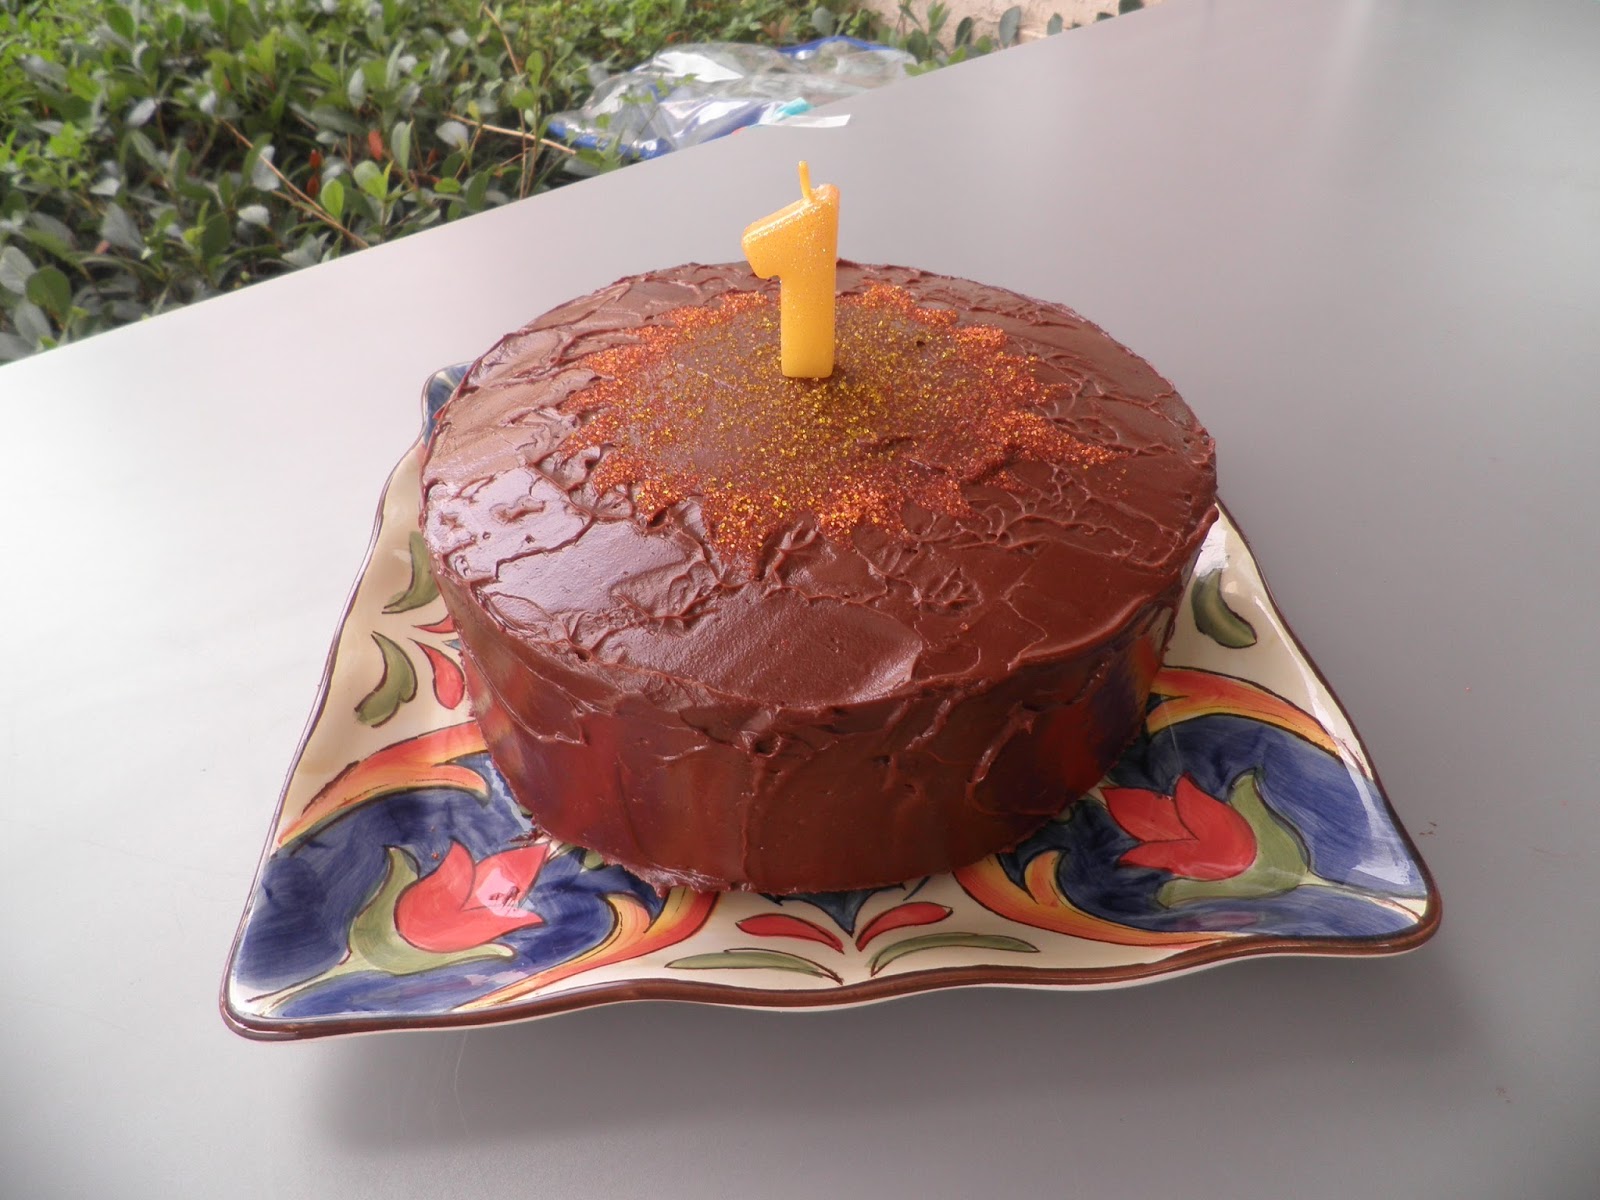
In celebration of our sons' first birthday, I followed the recipe from the smitten kitchen blog for the best birthday cake.  Note:  The first time I made this was for my husband's birthday.  I had a few mishaps (if you want entertainment, see previous post), which I learned from so this time the cake was PERFECT!  It seemed fitting that we make this particular cake again because the first time I made it I was very early pregnant (so early I didn't even know yet).   I like to experiment in the kitchen, but when it comes to baking I am really trying to be better about following the recipe exactly...at least the first time through.  It's so hard for me, but I am getting better :)  This successful second attempt is enough to convince me that I should trust the experts first time around.

I followed the recipe exactly for yellow cake with chocolate sour cream frosting, so I won't bother to write it all out.  We didn't find it to be too sour, it was a great pairing with the moist and dense cake.  I went a little light on the frosting, so I did have some leftover (at least a cup).

For frosting, I put a little dollop of icing on the center of the serving platter to hold the bottom layer in place.  Then, I slid some slips of parchment under the cake on all sides so the dish would stay clean post frosting.  My husband made the sun design by cutting a stencil from parchment.  Even though it wasn't intentional, I like the rippled effect of the icing caused by the parchment stencil.  It reminds me of the way heat creates a disturbance or distortion in the air.
The layers cooling

The Sun Cake
Either signing for "more" or perhaps clapping because he liked it?
My son looked absolutely astonished and delighted that I served him an entire slice of cake.  He had lots of chocolate frosting smeared into his clothes, deposited in his ears, and wiped through his hair.  Cake was being double-fisted, and crumbs were flying!  Happy birthday and thanks for taking this wild ride with us.

Thursday, June 14, 2012

Strawberry Muffins, Crisp and Dressing, Oh My!


The Hangry Foodasaurus herself!  2012
Hangry Foodasaurus, June 2012
  
           Hangry Foodasaurus, June 2012

There is nothing better than fresh, local produce!  I love the summer and all it has to offer.  This past weekend my husband and I went strawberry-picking at Red Fire Farm in Western, MA.  For the second year in a row we have our CSA here and this was our first visit to the farm.  It was a little adventure for us to get out of the city,  plus an experiment to see how long I could last in the car (at 28 weeks pregnant).  We rented a Zipcar for the day and headed out to the Pick Your Own patch in Granby, MA.  It was so beautiful to see rolling hills, hear frogs and peepers and see barn swallows swooping over the fields.  We could hear a baseball game nearby and the fresh air and breeze were incredibly therapeutic to us.  We were so used to our surroundings as children growing up around Pittsburgh, PA and living for 6 years in Ithaca, NY where open land and nature surrounded us.  We were excited to move to a city (Cambridge in 2010) but the glamour has worn off and we really realized how much we missed the farms and fresh air!  We still love cities, but we feel like someday we need to settle in a more wooded community :)


My plan was to take it easy and not overdo it, but as soon as I got in the fields I couldn't help but get into my Yoga squat position and pick away!  8 quarts of strawberries later my fingers were berry-stained and we were happily sweaty and satisfied with our goodies.


On the way home, with the strawberry scent wafting in the breeze, I began to dream up ideas for what to do with all of our booty.  I certainly was too tired to deal with them on Saturday, so we stored them in the fridge (unwashed) in open colanders to preserve freshness as much as possible.


On Sunday I was a baking machine making strawberry wheat muffins, strawberry crisp with almond crunch topping and strawberry-poppyseed salad dressing.  Not to mention having strawberries on granola, cereal, in fruit salad drizzled with yogurt smoothie and of course, by the handful!  We also froze some to have on the ready for fruit smoothies.


For the Strawberry Crisp, I adapted the recipe from Eclectic Recipes blog http://eclecticrecipes.com/strawberry-rhubarb-crisp


I doubled the strawberries, didn't use rhubarb and lessened the brown sugar.  I also added coconut to the topping.

Hangry Foodasaurus, June 2012
The muffins were very easy.  I followed a recipe from Alida's Kitchen  almost exactly.  I used a little more yogurt and did less sugar than instructed.  I also sliced a strawberry to place on top of each muffin for a nice presentation effect.  


For a really tasty dressing, try this strawberry poppy seed dressing.  For the salad I used mixed greens, spinach, slivered almonds, raisins, strawberries, onions and kohlrabi.

Strawberry Poppy Seed Dressing


HF, June 2012
Agave nectar-small amount
2 teaspoons German mustard (any will work fine though)
1/2 tsp. salt
1/3 cup rice vinegar (or apple cider, red or white wine would be good)
2 Tablespoons Vidalia onion (red onion could work here)
8 fresh strawberries
1 T. water
3/4 cup extra virgin olive oil (vegetable or canola would be OK)
2 tsp. poppy seed
Hangry Foodasaurus, June 2012
  
Throw all ingredients in the blender and puree.  Dressings are fun because you can mix and match ingredients that you prefer.  This dressing is a really pretty pink color when finished! 


If you haven't already, please sign up to become a follower of the Hangry Foodasaurus!  I love to share my recipes and love of food, so pass it on!  Thanks :)


Thursday, April 26, 2012

A Hangry Hiatus


I can’t believe how long it has been since my last post!  I am sorry for all of my readers who have by now, given up on the Hangry Foodasaurus.  I’d like to think I have a pretty good excuse for not writing and my hope is that once I explain what’s been holding me back, you’ll forgive me.

As some of you know I’ve just completed my 200-hour Yoga teacher training, which took place over the course of 9 intensive weekends.  We traveled from Boston to Philadelphia about once per month and Nathan and I were hosted while we were staying there by some very gracious friends in the area :).  The weekends were extremely challenging physically and mentally, but one particular weekend I was more exhausted than ever.  I could hardly keep my eyes open.   The next morning I tried drinking some coffee and for those of you who know me coffee is a must!  After the first sip I could hardly keep it down.  Hmmmm…well after putting two and two together I surmised I might be pregnant, and it turns out I am!

Of the many interesting changes that come with being pregnant I found one of the craziest to be the absence of hangriness.  No shakiness, dizziness, extreme agitation.  In fact, for the first 3 months I could hardly eat anything at all and especially couldn’t fathom touching a vegetable.  Hummus became my enemy.  The thought of salad made me gag.  I was all about reverting to my childhood:  mac and cheese, pop-tarts, frozen waffles, pierogies.  Thank goodness I am over that hump because it was starting to get a bit unhealthy.

Don’t get me wrong, I still need snacks and treats, but at least I can say I eat vegetables again.  Way back in December I started to get a hankering for scones.  I found a really good recipe from Joy of Baking, which I’ve adapted slightly.  Since then I’ve made this recipe a total of three times, each time varying the ingredients ever-so-slightly with amazing results. 

You’ll need:


  • 2 cups (260 grams) all purpose flour
  • 1/4 cup (50 grams) granulated white sugar
  • 1 1/4 teaspoon baking powder
  • 1/4 teaspoon baking soda
  • 1/4 teaspoon salt
  • 1/2 cup (113 grams) (1 stick) unsalted butter, cold and cut into pieces
  •  1 total cup of filling ingredients such as: chocolate chips or chunks, toasted walnuts or pecans, dried cherries or cranberries, fresh blueberries or candied ginger
  • 1 teaspoon pure vanilla extract OR almond or lemon extract
  • 1-2 teaspoons of lemon or orange zest
  • 2/3 - 3/4 cup (160 - 180 ml) buttermilk (I never seem to have buttermilk so you can use regular milk and sour it by adding a tablespoon of lemon juice and allowing it to stand for 10-15 minutes)
  • Turbinado sugar for sprinkling


Basically you want to pick things that sound like they’d work well together like:  Lemon-ginger, dark chocolate and dried cherries and walnuts, cranberry-orange, lemon-blueberry.

How to:


1) Preheat oven to 400 degrees F (200 degrees C) and place rack in middle of oven.

2) Grease a baking sheet with organic vegetable shortening or use parchment paper.

3) Zest orange or lemon if using zest.

4) In a small measuring cup whisk together the buttermilk (or milk and lemon juice) and extract.

5) In a large bowl, whisk together the flour, sugar, baking powder, baking soda and salt.

6) Cut the cold butter into small pieces and blend into the flour mixture with a pastry blender or two knives. I don’t own a pastry blender so I just ended up crumbling it with my fingers to get all the big chunks out.  (The mixture should look like coarse crumbs.)

7) Stir in the chocolate chunks, dried cherries, nuts, lemon or orange zest, etc.

8) Add wet mixture to the flour mixture. Very Important! Stir just until the dough comes together (add more buttermilk or flour as necessary). Do not over mix the dough.

9) Transfer to a lightly floured surface and knead dough gently four or five times and then pat the dough into a circle that is about 7 inches (18 cm) round and about 11/2 inches (3.75 cm) thick. At this point my dough is always on the flaky, dry side and not every bit of flour is mixed in but that is OK.

10) Cut this circle in half, then cut each half into 4 pie- shaped wedges (triangles). Place the scones on the baking sheet. Brush the tops of the scones with a little milk and sprinkle with turbinado sugar for a nice effect.

11) Bake for about 15 to 20 minutes or until golden brown and a toothpick inserted in the middle comes out clean. Remove from oven and place on a wire rack to cool.

Makes 8 scones.

Dark Chocolate, Cherry, and Walnut Scone: A. Andiorio
These have been an absolute winner every time I’ve made them.  They are moist, flaky and go great with your morning coffee or tea.  They are best consumed right out of the oven, but if you somehow have any leftovers they are also good warmed up in a toaster oven.  

Monday, January 16, 2012

Birthday Times! Ice Cream and Cake and Cake!

The finished product!  Yellow Cake with Chocolate Sour Cream Frosting

Yummilicious with French vanilla ice cream
On January 3, we celebrated Nathan's 31st birthday!  Some neighbors and friends joined us and though it was bitter cold outside (8 degrees F!) we had a cozy little gathering.

If you want the recipe, it is from an awesome food blog Smitten Kitchen 

I pretty much followed the recipe exactly, except for the cake: I used wheat flour, and organic cane sugar, which created a cornbread-like effect and was very tasty.

Also for the icing what I did differently was omit espresso and used brown rice syrup instead of corn syrup.  It was sort of difficult to spread, but with some elbow-grease it all worked out nicely.

Now for the hilarious part!  So, I have never made a real, from-scratch cake.  I was hell-bent on doing a 9-inch layered cake and this recipe seemed fool-proof, or so I thought...

Cake batter prep went smoothly and looked beautiful.  I popped the pans in the oven and about halfway through baking I smelled something burning.  I ran over to the oven to discover my cakes flowing like lava out of the pans and oozing onto the oven and all over the racks!!!  I quickly slid some baking sheets under to catch the goo.  Sadly, that didn't work and the bits on the bottom caught fire and smoke was billowing out of the oven :(

Thankfully, Nathan saved the day by calmly opening the window, shutting off the oven and helping me pry burnt pieces from the oven.  He reassured me the cakes could be recovered, which I doubted but wanted to believe.

So I set about scraping the pans' edges free of batter, placing sheets under the pans and commencing with part 2 of the baking.  It worked!!!  I was thrilled!  Nathan was thrilled too because the cake kept oozing but eventually formed a nice little mold of cake around the outside of the pans which we were able to eat right away!

If I didn't tell you it happened, there was no way to tell there was a cake mishap!  The only thing I can think that went wrong is that perhaps the pans were 8-inch causing the overflow.  Or maybe my baking soda was too fresh?  I checked and the flour was definitely not self-rising.

Everyone liked it, we had a little adventure making it and I finally succeeded in making a cake from scratch.  Yay!

I'd love to hear about your baking mishaps--do share as it's way more funny after the fact ;)

Wednesday, April 6, 2011

Baker's Dozen Cookies (Chocolate Chunk Variation) by, the Hangry Foodasaurus

For about 4 1/2 years, I worked at a continuing care retirement community as an "activities associate."  Essentially, this means that I planned and led recreational activities for residents of the long term care and assisted living communities.  I quickly learned that nothing boosts morale quite like baking cookies.  

Every Wednesday morning, an elderly volunteer led a cookie-baking group.  By 10:30 am the wonderful scent of cookies baking would be wafting down the hallways--even clear across the building!  It would draw the attention of the residents, staff and visitors.  Only those with the most intense willpower could resist a homemade cookie fresh out of the oven. We had 3-inch thick binder with hundreds of recipes protected by clear plastic sheets to choose from every week.  Everyone had an opportunity to request their favorite cookie to be made in an upcoming session.  "Cookie day" quickly became the highlight of everyones' week and we always made at least 6-10 dozen cookies to share.  


Somehow, that wasn't enough.  When we ran out of cookies--look out!!!  There were some very hangry residents when 3 o'clock tea time rolled around if we didn't serve the expected homemade cookies and had to resort to the dreaded, store-bought varieties.   This cookie shortage was remedied by adding an additional baking day (Sunday morning) as well as an emergency day if needed.  We'd truly created a monster, well, a group of elderly cookie monsters!  


Our cookie volunteer inspired me to attempt my own cookie recipe.  After all the years of practice, at least 2x/wk for 4 1/2 years, I've become adept at whipping up my own cookies without a recipe.  What I have to share with you is my go-to cookie recipe.  I finally decided to write it down after numerous requests from friends and family.  It is so good that we make them at least once a month for dessert.  I hope you like them as much as we do!  Before beginning the disclaimer I will give you is that I have only made these cookies using organic or at the very least natural ingredients whenever possible.  The shortening I use is organic, non-hydrogenated and all-vegetable.  I honestly don't know how they'll turn out without super high-quality stuff.


Preheat the oven to 350 degrees F.
In one large bowl add:

  • Approximately 1/3 cup of shortening 
  • 1/4 cup brown sugar
  • 1/4 cup white sugar

Crumble above ingredients with fingers until moist.
Next, add one egg, beaten and 1/4 teaspoon vanilla-stir into wet mixture.
Then add below (dry) ingredients to the wet mixture using a wooden spoon and hands if needed.  (no need to dirty another bowl if you want you can just add them into the large bowl)

  • 1 cup 50/50 (whole wheat/white) + 3 tablespoons flour
  • 1/4 teaspoon of baking soda
  • 1/4 teaspoon of baking powder
  • dash of salt

Lastly, take a block of Callebaut semisweet chocolate and chunk it until you have about one cup.  (The sizes of the pieces will vary, but it doesn't matter)
Mix chocolate chunks into dough.  Form dough balls with two teaspoons or hands and place on one cookie sheet.  We've ended up with anywhere from 9-13 cookies, just depends on your size preference. 
Bake for 8-12 minutes (size dependent) or until center of cookie is slightly firm when you press on it with a finger.  Let cool on cookie sheet for 1-2 minutes
Using spatula, slide onto wire racks.  Eat them while they're warm with a glass of milk!
Note: for other fun variations you can use chocolate chips or sundrops.  Have fun!


A recent chocolate chip version, yummy!